Fun with light emitting diodes
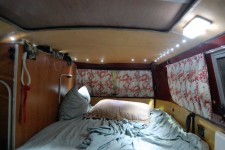
I’ve gotten lots of comments about our interior lighting ever since our trip started. Many folks wanted a closer look and said they would like to do the same. Now that we’ve been camped on the beach for a while, I’ve had time to dig through some old photos and write something up on what I’ve made. If you’re not interested in customizing your bus headliner, then you can probably just skip the rest and wait until tomorrow’s post. Otherwise, enjoy…
Before deciding to take off around the Americas in our bus, one of my primary concerns – believe it or not – was lighting. Good lighting is critical if you want to be happy (scientifically proven.) All of those TV shows with peculiar and unreal dramatic lighting (West Wing, CSI, etc) drive me crazy – what laboratory (or White House) is dimly lit with blue and red lights?
Of course, I also wanted it to be efficient and cheap. LEDs fit the bill perfectly. Since I’m going the inexpensive route, there are only going to be about 50 LEDS – plenty of adequate lighting, but nothing crazy like Cash Cab.
Part of this post includes making a new birch headliner – we needed one anyway, so skip ahead if you are using your existing one.
Making the headliner:
1. Locate 5’x5′ sheets of Baltic Birch (3mm or 1/8″ thick.) This may be the hardest part of the entire process. It’s not a common size, but you need it. This is the original material used in your bus – don’t substitute. Call around. I found it in stock at a lumberyard in San Leandro, CA. You need one sheet for the rear and one for the front. Go ahead an buy an extra one in case you screw up or want to make your own skateboard later (it’s the best glue-lam skateboard material.) I paid about $25/sheet.
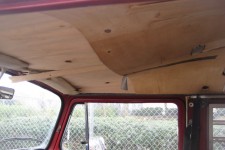
2. Trace the pattern. Hopefully this part is obvious. Our bus didn’t have one, so it wasn’t. I made a new friend (thanks Peter!) who had a spare headliner laying around and used it as a pattern on my sheet of Birch. I extended it rearward and customized it a bit since I wouldn’t be re-installing the head-knocker rear upper cabinet.
3. Use your jig-saw to cut it out. Test for fit – actually install it. It can be a tough one-person job, but it’s not too hard once you get the hang of it (and it fits properly.) Trim it down a little if it’s just impossible to install, but over-trim it and you’re on to your second piece of Birch already.
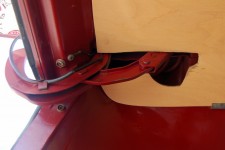
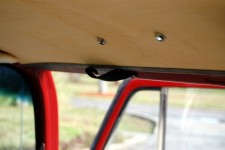
4. If you are leaving out the head-knocker cabinet, like me, then pay special attention to the rear hinges. See the photo. You’re on your own here, but a bigger cut won’t kill you and is more likely to fit the first time. I probably had it in and out 6 times before I got it right.
5. That’s it. Go ahead and fine-sand and stain/varnish and admire your work.
Installing the LEDs.
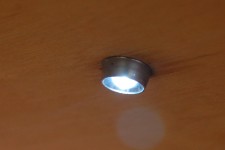
1. buy your LED’s. Compare specs and get the brightest ones you can find. I bought 8 mm LEDS (resistor pack included) and the bezels separately on eBay. I think I paid about $35 for everything including shipping from China.
Before I started, I shopped around quite a bit for Christmas lights or some other LED strand that would fit the bill (high brightness, pre-wired, cheap) but I just couldn’t find anything that was acceptable. Big waste of time for me – maybe you can do better.
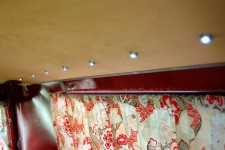
2. Measure your headliner for bezel/light placement. This is important. Look at the roof of your bus – mine has large openings on 8″ centers (this varies around the perimeter) where the lights can recess with no problems. They are large openings, but if you miss, you will have a problem. Measure, measure again, and drill all of your holes.
3. Screw in all of your bezels (my LEDs will just push in from behind.)
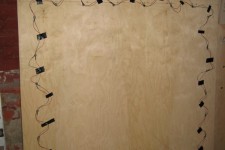
4. Start cutting wire and soldering up your lights. It looks like a big job, but it’s not too bad. Just get started and you’ll be finished in no time. If you’re not good at soldering, you will be by the end. Wire them all up in parallel with their own resistor.
5. Test your strand. Just put it across a 9V battery or something and it will light up if you’ve done it right. If not, try again. Also, I changed my resisters to run the LEDs at about 20% over the max current spec (more light!). So far so good.
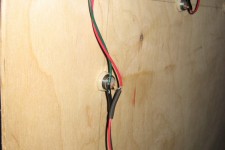
6. You will probably want to cover all of your exposed solder joints and wire ends with dope – not *that* kind (I’m not judging) – the glue kind. Electrical tape or heat shrink will work too, but dope/insulating glue is probably the best. I used heat shrink and it was a real pain.
7. Push them into the bezels and you’re ready to install! Install the headliner (you’re good at it now) making sure not to smash any of the ends of your LEDS on the frame. Make sure you have the wire leads sticking out near the old switch.
8. Wire into the old switches. I put the rear headliner lights on the old push-button switch along with the original side-table lights (I also replaced these festoon bulbs with a home-made 6-LED ‘bulb’ as well). I made a front headliner and wired it into the original dome light (and also replaced this festoon bulb with LEDs.)
Of course, I put lights in the smaller side panels, but this part should be obvious – you’re a pro by now. I also put some in the glove box and wired them into the headlight switch. this has come in handy many times. The only place I forgot was the engine compartment – next time.
We’ve camped in the van and used these things almost every day for the past 18 months.
I’ve only had a few problems so far. Some of my solder joints were poor and snapped after 10K miles (or so) of rattling around. I just re-soldered them and they’ve held ever since. My son (5) has pushed a few of the lights in and out of their bezels – no big deal – but could have been prevented by gluing them in place.
We have plenty of light, but in hindsight I may have installed even more. Maybe double (two at every point.) There’s just no such thing as too much light – you can always put it on a dimmer.
If I recall, a single original incandescent festoon bulb from the bus pulled 800 mA at 12V. About 10W. Crazy. There were four of them – don’t leave them on all night.
Now, each one of these LEDS pulls about 15 mA at 12V. With 50 of them, that’s only 9W total – less than one single original bulb… and we have lot’s of light. Turn them on and let them burn all night.
Bueno,
Jason

Awesome. Can’t wait to do this with the Bumblebus this summer. 🙂
Nice box of wine, Ang.
Nice work. I was lazy and just got the stick-on lights from Home Depot. They pull so little juice that I have not had to replace a battery yet.
That looks great… Neat Job! When we bought our camper in the US I searched everywhere for LEDs – and couldn’t find a thing except these cheap battery-push-on lights they sell in hardware stores.
Finally after over a year on the road somebody on Natcoa posted about LED replacement bulbs for normal car light sockets. I ordered some for shipment to Colombia – and finally we could read late into the night without worrying about our battery.
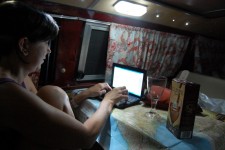
Couldn’t you at least have made the bed for the snazzy photo op?! (kidding, of course) 🙂 I know your mom commented on the wine, but I personally like the map tablecloth!
Cheers!!
very informative. I always enjoy the tech articles. Seeing how you do everyday things helps those of us still in the planning phases of such trips to solve problems with road tested techniques.
i’m sitting at my desk right now (in my office) and the lighting is SO bad i’m wearing a sun visor. my desk is indoors. i’m UNHAPPY and i’m not even very good at science.
laurawp – we’ve never been bed-makers 😉
Pingback: BodesWell » Birch Interior